
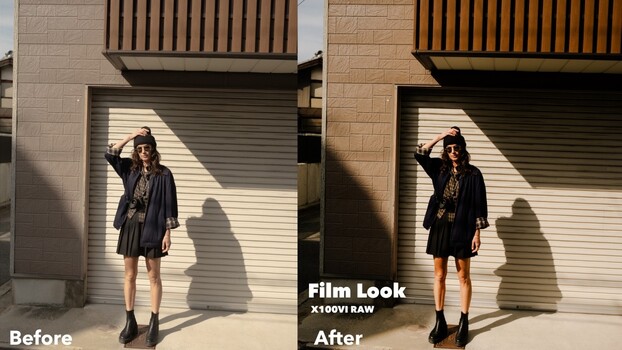
The Fujifilm X100VI has become one of the most talked-about compact cameras in recent years, and for good reason. It fits in your pocket, goes anywhere, and produces files that can genuinely be pushed toward a 35mm film aesthetic without much fighting.
Coming to you from Samuel Elkins, this detailed walkthrough covers how Elkins approaches raw editing with the X100VI and why he chooses raw over JPEG even with such a small, grab-and-go camera. The short answer is control: editing trends shift, your eye changes over time, and a raw file lets you go back years later and re-edit with your current sensibility. Elkins points out that the X100VI JPEGs are genuinely excellent straight out of camera, and the in-camera film simulations are a legitimate reason people buy into the Fujifilm system in the first place. But for him, that flexibility of the raw file is worth it every time.
One of the more practical points Elkins raises early is white balance. Shooting raw means white balance is completely adjustable after the fact, but he still shoots intentionally warm, typically somewhere between 5,600 and 6,400 Kelvin depending on the environment. His approach to highlights is worth paying close attention to: instead of simply dragging the highlights slider down globally, he uses a linear gradient mask over the sky and applies a curve within that mask to roll off the whites in a way that feels soft and natural rather than processed.
The goal throughout is to strip away the clinical sharpness that gives modern digital files that hard, technical edge. Elkins reduces sharpness slightly using a full-frame linear gradient over the entire image, typically just 10 to 20 points, which he describes as making the image “bloom” slightly. It’s subtle, but he makes the case that these small decisions compound. He also flags a common overcorrection he sees online: people leaning too hard into warm orange highlights and shadows through split toning, a look that’s trending now but that he argues will feel dated quickly. The video goes on to cover skin tone editing for portraits, where his approach is to let tones breathe rather than punch them up, and he demonstrates how Lightroom’s AI masking tools make targeted skin tone adjustments much faster than they used to be.
Something Elkins addresses directly that doesn’t get enough attention is the dynamic range question. He shoots the X100VI slightly underexposed by about half a stop to protect highlight detail, which he considers more recoverable-looking than blown shadows. The raw file handles it without issue, which speaks to how capable the sensor actually is despite its compact size. Check out the video above for the full editing walkthrough from Elkins, including his specific curve techniques, how he handles portrait skin tones, and how he combines film simulation profiles.
#Raw #Editing #Workflow #Film #Aesthetic #Fstoppers #trending #[now:year]